Difference between revisions of "The Gimp"
| Line 103: | Line 103: | ||
== Frequently asked "How do I ... " == | == Frequently asked "How do I ... " == | ||
| − | * | + | * [http://www.ischool.utexas.edu/technology/tutorials/graphics/gimp/02_web_optimize/05_jpeg.html ...Save to a jpeg?] |
| − | * | + | * [ ...Save to a GIF?] |
| − | * | + | * [http://software.newsforge.com/software/05/04/27/1327225.shtml ...Remove the background or isolate a part of the foreground?] There are some basic steps... |
| − | + | ** [http://docs.gimp.org/en/gimp-layer-alpha-add.html Don't forget to add an alpha channel] | |
| − | + | ** You may want to duplicate the layer first | |
| − | + | ** [http://docs.gimp.org/en/gimp-dialogs-structure.html#gimp-layer-dialog Select the layer you want to work on] | |
| − | + | ** Select the area you want to remove (or isolate) using one of the [http://docs.gimp.org/en/gimp-using-selections-free-select.html selection tools] | |
| − | + | ** Delete the selection | |
[[category: Classes]] | [[category: Classes]] | ||
Revision as of 10:34, 27 October 2006
About the class
April, 2005 was the first time MNR offers a class on the Gimp at Free Geek, but it's far from the first time he's taught the subject. The Gimp is the image editing software distributed on FreekBoxes - and used by all kinds of people to make cool pictures. This is an introductory-level class, and should be accessable to anyone who has mastered the material taught in the FreekBox Adoption Class.
Related Links
From the project's web site, gimp.org:
Class 1: Starting and Selections
right-click to download today's suggested image
- Finding and starting the Gimp
- Navigating the Gimp
- Opening files, Saving Files
- Freegeeks - Use Offline storage! Classroom machines are wiped clean every evening.
- Help! Using context sensitive help
- Palettes: Tools & [Layers], (but not Channels or Paths)
- Making selections
- Dealing with Floating Selections
Something fun - change the color of the background.
- use the elliptical select tool to select the earth in today's suggested image
- float the selection
- convert the selection to a new layer
- change the foreground color (click on the black box in the tool palette)
- add a new layer with a colored background (shift - new layer)
- move the layers so the colored layer is underneath the earth
Class 2: Color select and Magic wand
Right-click to download today's suggested image
- Brief review
- Resizing images, resizing selections
- Color Select Tool
- Magic Wand
- Something fun - Float the rocket or the jellyfish (right click on the link to download)
- open today's suggested image
- open the rocket or jellyfish
- use the layer palette to add an alpha channel how to do it
- Remove the background of the rocket or jellyfish by clicking on the background with the magic wand or color selection tool. (hint - the rocket is easier)
- drag the layer (from the rocket or jellyfish layer panel) into the space cloud image
Class 3: Edges, tools, fills, paths
Right click to download today's suggested image
- Edge Select
- Move, Rotate, shear, perspective & flip
- Fill, Gradient, pattern paint
- Quick mask & save to path. (tutorial on quickmask)
- path to selection
- Manipulating Selections
- Filters
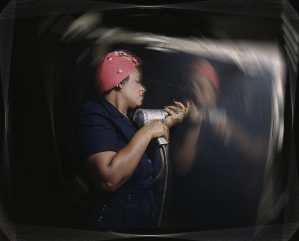
Something fun - isolate Rosie from the background
- Use the edge select tool, save to path and quickmask to create a selection around Rosie
- duplicate the background
- Select and float Rosie to a new layer. Turn off her visibility
- use the motion filter on the duplicated background
- Turn the "floated" version of Rosie back on.
Class 4: animations
Today's image (warning, 4 megabytes) contains XCF files for use with GIMP
- Animations
Class 5: paths
Right click to download this sample image
- When you open this document, be sure to "Import Paths"
- The Paths dialog
- Selection to path
- Path to selection
- Stroking a path
- The Path Tool
- Path from text
Class 6: Common tasks
- Red eye removal
- Saving for the web
- Reducing the size of an image
Class 7: Fixing Images
- [Color Tools - Levels ] This tool can be used to adjust colors. It will be easier to understand this tool if you understand [histograms].
  * Use the Black Eyedropper to pick a black point.
  * Use the White Eyedropper to pick a white point.
  * Adjust mid-tones using the slider.
  * Color cast can be adjusted using the channels and eyedroppers
Frequently asked "How do I ... "
- ...Save to a jpeg?
- [ ...Save to a GIF?]
- ...Remove the background or isolate a part of the foreground? There are some basic steps...
- Don't forget to add an alpha channel
- You may want to duplicate the layer first
- Select the layer you want to work on
- Select the area you want to remove (or isolate) using one of the selection tools
- Delete the selection


