Difference between revisions of "ATK Motherboard Testing Procedures"
Jump to navigation
Jump to search
| Line 12: | Line 12: | ||
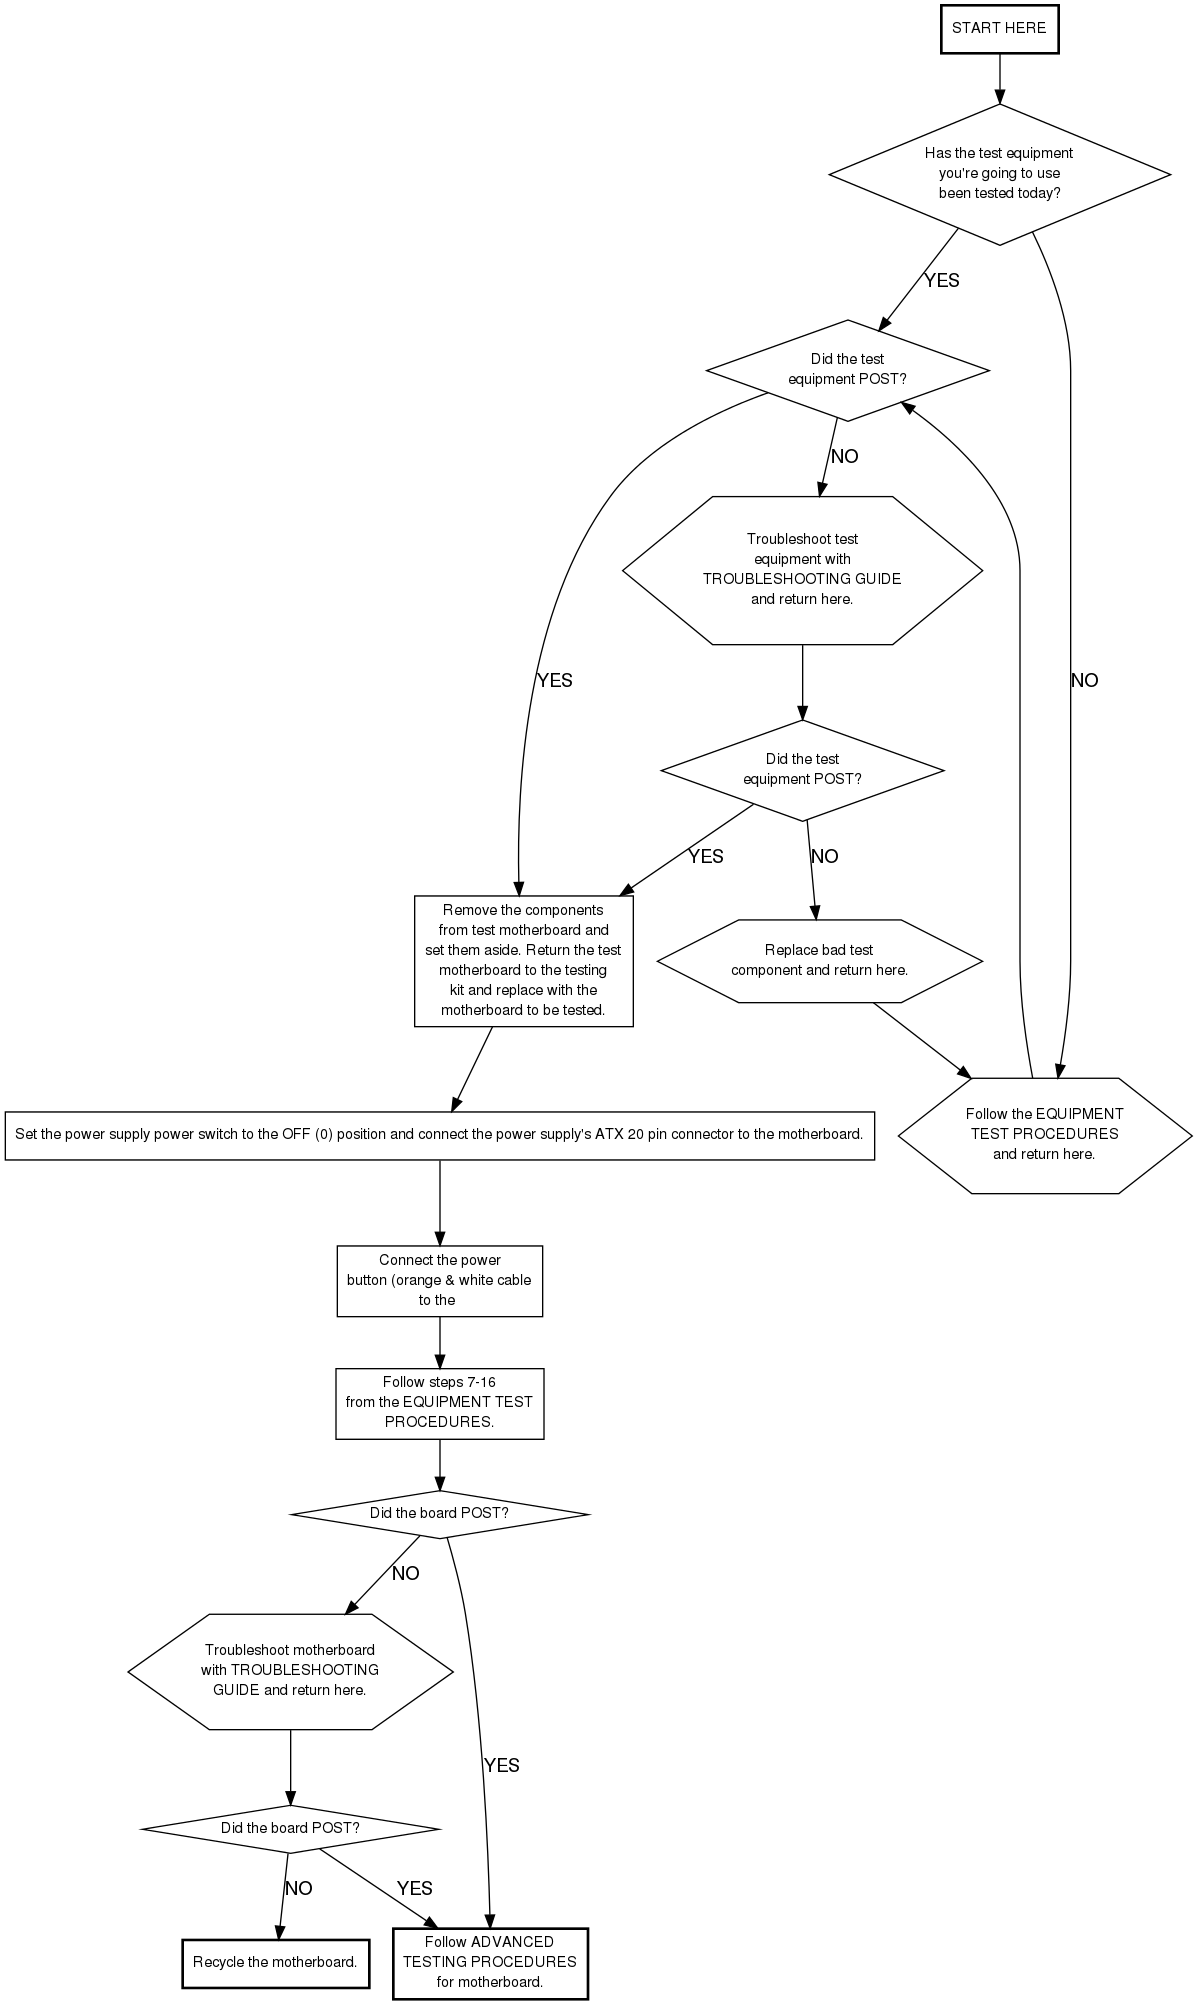
trouble [label="Troubleshoot test\nequipment with\nTROUBLESHOOTING GUIDE\nand return here.", shape="hexagon"] | trouble [label="Troubleshoot test\nequipment with\nTROUBLESHOOTING GUIDE\nand return here.", shape="hexagon"] | ||
badtest [label="Replace bad test\ncomponent and return here.", shape="hexagon"] | badtest [label="Replace bad test\ncomponent and return here.", shape="hexagon"] | ||
| − | remove [label="Remove the components\nfrom test\ | + | remove [label="Remove the components\nfrom test motherboard\nand set them aside. Return\nthe test motherboard\nto the testing kit and\nreplace with the motherboard\nto be tested.", shape="box"] |
| + | power [Set the power supply power switch to the OFF (0) position and connect the power supply's ATX 20 pin connector to the motherboard.", shape="box"] | ||
button [label="Connect the power\nbutton (orange & white cable\nto the "power on"pins of the motherboard.", shape="box"] | button [label="Connect the power\nbutton (orange & white cable\nto the "power on"pins of the motherboard.", shape="box"] | ||
716 [label="Follow steps 7-16\nfrom the EQUIPMENT TEST\nPROCEDURES.", shape="box"] | 716 [label="Follow steps 7-16\nfrom the EQUIPMENT TEST\nPROCEDURES.", shape="box"] | ||
Revision as of 12:22, 1 August 2007