Difference between revisions of "ATK Motherboard Testing Procedures"
Jump to navigation
Jump to search
| (5 intermediate revisions by one other user not shown) | |||
| Line 1: | Line 1: | ||
| + | {{Delete}} | ||
| + | |||
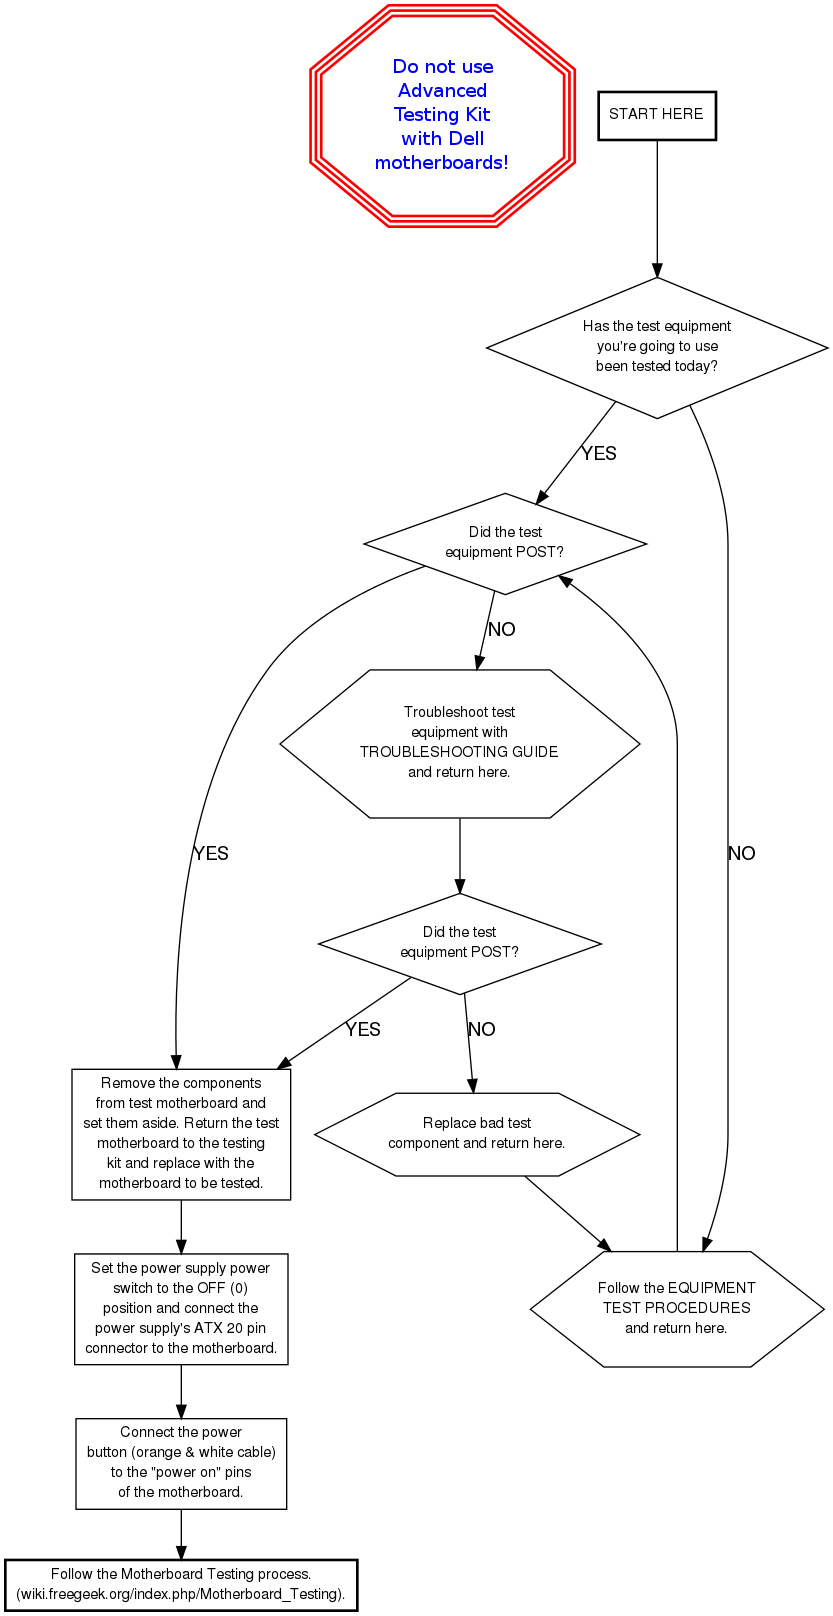
<graphviz> | <graphviz> | ||
| − | digraph | + | digraph { |
node [fontname="Helvetica", fontsize="11"] | node [fontname="Helvetica", fontsize="11"] | ||
| Line 17: | Line 19: | ||
power [label="Set the power supply power\nswitch to the OFF (0)\nposition and connect the\npower supply's ATX 20 pin\nconnector to the motherboard.", shape="box"] | power [label="Set the power supply power\nswitch to the OFF (0)\nposition and connect the\npower supply's ATX 20 pin\nconnector to the motherboard.", shape="box"] | ||
button [label="Connect the power\nbutton (orange & white cable)\nto the \"power on\" pins\nof the motherboard.", shape="box"] | button [label="Connect the power\nbutton (orange & white cable)\nto the \"power on\" pins\nof the motherboard.", shape="box"] | ||
| − | process [label="Follow the | + | process [label="Follow the Motherboard Testing process.\n(wiki.freegeek.org/index.php/Motherboard_Testing).", shape="box", style="bold"] |
| − | |||
| − | |||
| − | |||
| − | |||
| − | |||
| Line 48: | Line 45: | ||
button -> process | button -> process | ||
| + | } | ||
| + | </graphviz> | ||
| − | + | [[Category:Advanced Testing Kit]] | |
| − | |||
| − | |||
| − | |||
| − | |||
| − | |||
| − | |||
| − | |||
| − | |||
| − | |||
| − | |||
Latest revision as of 13:51, 10 May 2013
 This page has been requested to be deleted. |