Difference between revisions of "Motherboard Testing"
Jump to navigation
Jump to search

(Modified Flowchard. Added beep code link) |
|||
| Line 83: | Line 83: | ||
cpu [label="CPU may not work, and need to be changed. Does it post ?", fontsize="9",shape="box"] | cpu [label="CPU may not work, and need to be changed. Does it post ?", fontsize="9",shape="box"] | ||
| − | jumpers [label="Check the Bios Dip Switches | + | jumpers [label="Check the Jumpers and Bios Dip Switches. See manufacturer manual Does it post ?", fontsize="9",shape="box"] |
cmos [label="After clearing the CMOS, does it post?", fontsize="9",shape="box"] | cmos [label="After clearing the CMOS, does it post?", fontsize="9",shape="box"] | ||
Revision as of 11:51, 7 August 2007
Process
- Check the motherboard and be able to identify
- Motherboard type (ATX family, Baby AT, LPX, NLX
- Packaging type ( SECC, PGA…)
- Socket type (Slot 1, Slot A, Socket A, Socket 370…)
.

Blown capacitors Check for curved or leaking top.
- Check the capacitors
- If only one capacitor is bad, send the motherboard to recycle except if it is one that supports Pentium P4.
- If no capacitors look bad, carry on…
- After checking the packaging and the socket type that matches the motherboard,
- Identify the motherboard by manufacturer, model, version
- Go to the manufacturer website or just search via google and determine with which range of processor the motherboard is compatible.
- Put a compatible heatsink with a fan on top of it.
- Add some memory
- DIMM modules, SDRAM, DDR SDRAM or Rambus RDRAM (remember to install Rambus in pairs and use CRIMMs).
- Attach all the cables on the motherboard.
- Use an IDE cable to connect the hard drive to the Primary IDE.
- Use the second IDE cable to connect the CDROM drive to the Secondary IDE.
- Use the third IDE cable to connect the Floppy Drive to the motherboard.
- Check the battery for the CMOS, if less than 3 volts replace it.
- Try to get the board to POST (see flowchart).
- If board beeps but won't post, check the Beep Codes and diagnose the problem.
FROM NOW ESD PRECAUTION
- While testing, when you change the display screen, sometimes the mouse doesn't respond. At this point, NO PANIC !!! All you need to do is to press Ctrl + Alt + F1 then Ctrl + Alt + F7 and you get it back.
- Now you are ready to connect the ATX power connector on the motherboard. Then turn the power supply on.
- The system can POST immediately or if not, you need to turn on the switch on the motherboard. (You have to be careful and make the contact between two metallic pins)
- Now starts the fun. You’re mission if you accept it is to determine if this motherboard works or not.
- Before to make any hurry diagnostic, be sure that your processor is compatible and works, the memory modules are reliable, AGP video card is working.
.

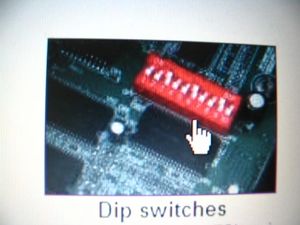
Dip switches Check for dip switches setting in the motherboard manual.
- You can also have a look to the BIOS jumper setting or dip switches if present on the motherboard. They are sometimes not set properly. See manufacturer manual.
- Ok so now your motherboard POST correctly and let you access the Basic Input/Output System or BIOS. (Esc, F1, F10 or Delete are the potential key to access it)
- At this stage, you need to know that the BIOS recognize the Hard Drive, the CDROM drive and the floppy drive. Don’t worry if you don’t see the CDROM drive in the bios it doesn’t show it all the time, but instead you will pay close attention to the screen when booting.
- When the system boots, you will be able to check one more time that the basic hardware are detecting.
- From now you can consider the motherboard is working. Don’t forget to stick a gizmo number on it with a quick description of the processor.
Useful links
- Information on different motherboards with summary description, it's quiet commercial but it provides quickely the basic information you're looking for : http://www.motherboards.org/ For complete and accurate information on motherboard just go to manufacturer website like Abit [1], Asus [2], MSI [3] and the others. Sometimes you are able to download the motherboard manual.
- The two main processors manufacturers can be visited on : http://www.intel.com/ and http://www.amd.com/us-en/
- If you just want an answer to any question around the computer or to understand something, go to http://computer.howstuffworks.com/
Flow Chart
Here's a chart flow that can help you to visualize the process
<graphvizr>
digraph D {
start [label="START HERE", fontsize="11", shape="box", style="bold"]
bios [label="Enter the BIOS", fontsize="11", shape="box", style="bold"]
  recycle       [label="RECYCLE", fontsize="11", shape="box", style="bold"]

  capacitors    [label="Do you notice any blown capacitors ?", fontsize="9",shape="box"]
p4 [label="If motherboard supports pentium 4 send it to tree house otherwise recycle it", fontsize="9",shape="box"]
connection [label="After checking the connections, Does it post ?", fontsize="9",shape="box"]
memory [label="After moving, changing memory modules, Does it post ?", fontsize="9",shape="box"]
video [label="On board video, try an AGP card. Does it post ?", fontsize="9",shape="box"]
  cpu           [label="CPU may not work, and need to be changed. Does it post ?", fontsize="9",shape="box"]

  jumpers       [label="Check the Jumpers and Bios Dip Switches. See manufacturer manual Does it post ?", fontsize="9",shape="box"]
cmos [label="After clearing the CMOS, does it post?", fontsize="9",shape="box"]
  start       -> capacitors [taillabel=""]
  capacitors  -> p4 [taillabel="YES"]
  capacitors  -> connection [taillabel="NO"]
  connection  -> cmos [taillabel="NO"]
  connection  -> bios [taillabel="YES"]
  cmos        -> memory [taillabel="NO"]
  cmos        -> bios [taillabel="YES"]
  memory      -> jumpers [taillabel="NO"]
  memory      -> bios [taillabel="YES"]
  jumpers     -> video [taillabel="NO"]
  jumpers     -> bios [taillabel="YES"]
  video       -> cpu [taillabel="NO"]
  video       -> bios [taillabel="YES"]
  cpu         -> jumpers [taillabel="NO"]
  cpu         -> bios [taillabel="YES"]
}
</graphvizr>