Motherboard Testing
Process
First, grab a motherboard and a motherboard testing kit which contains known good video cards, memory, and processors. Check the motherboard to see if it is on the list of mobos we like by identifying the socket number.
Boards We Like to Test

Blown capacitors Check for curved or leaking top.
- Check for visual defects (blown caps, mutilated components)
- If only one capacitor is bad, send the motherboard to recycle except if it is one that supports Pentium P4.
- look for burn marks or discoloration.
- After checking the packaging and the socket type that matches the motherboard,
- Identify the motherboard by manufacturer, model, version
- Go to the manufacturer website or just search via google and determine with which range of processor the motherboard is compatible.
- Put a compatible heatsink with a fan on top of it.
- Add memory
- DDR, DDR2, DDR3, depending on the manufacturer suggestions.
- Attempt to POST
- connect the minimal things needed to POST (power, keyboard, video, etc)
- if you need help see flowchart below.
- If board beeps but won't POST, check the Beep Codes and diagnose the problem.
- Boot into BIOS
- Set clock and date.
- Change boot order to to CD Rom first , Hard Drive second, Floppy disconnect.
- Power down, then attach
- Use an IDE cable (40 pin) to connect the hard drive to the Primary IDE.
- Use the second IDE cable to connect the CDROM drive to the Secondary IDE.
- Boot to Memtest, Let it run for a minute, it will run for ever if you let it (to get to memtest, hit escape on the screen after the BIOS option).
- Boot up to Operating System
- Check that the mouse and keyboard work
- If you have on-board video, check that it works.
- Test all the USB ports with a mouse
- If you have on-board sound, play a audio cd, if not then open a terminal and run basiccheck -m
- Make sure the audio jumpers on the motherboard are set correctly. Here is a common configuration:
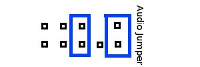
- For each memory slot, plug in memory and POST to test it.
- Test each card slot by plugging in network cards and connecting to the internet with each card.
- Run stress-test

- Some cases might call for testing
- SATA
- If the motherboard works and is worthy of the store then label it, anti-static bag it and put it in the store box.
- Fill out label (example below) by checking off all working components. For card and memory slots, list the number of slots as well.

Useful links
- Information on different motherboards with summary description, it's quite commercial but it provides quickely the basic information you're looking for : http://www.motherboards.org/ For complete and accurate information on motherboard just go to manufacturer website like Abit [1], Asus [2], MSI [3] and the others. Sometimes you are able to download the motherboard manual.
- The two main processors manufacturers can be visited on : http://www.intel.com/ and http://www.amd.com/us-en/
- If you just want an answer to any question around the computer or to understand something, go to http://computer.howstuffworks.com/
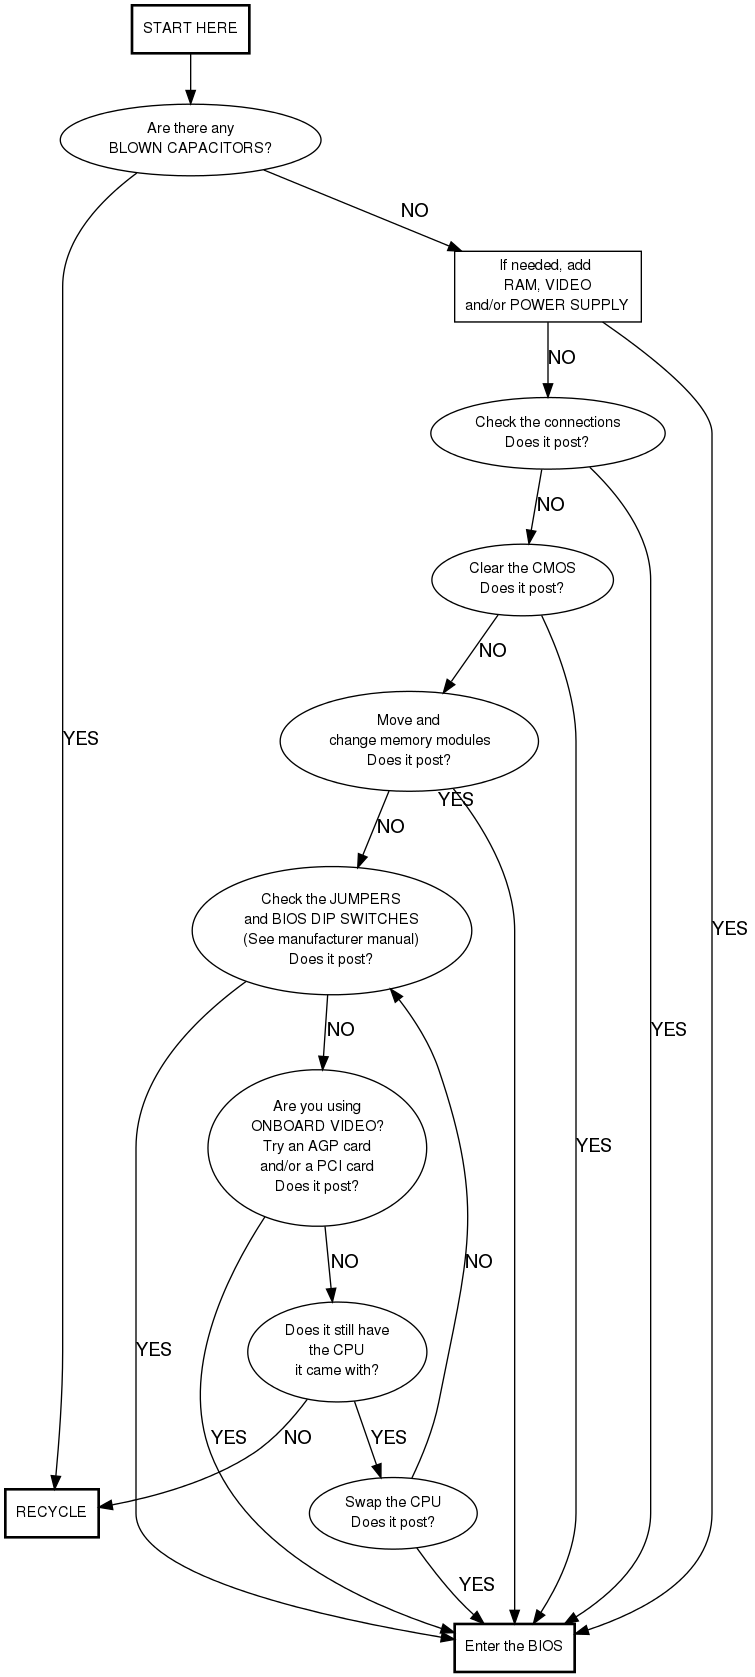
Flow Chart
Here's a chart flow that can help you to visualize the process