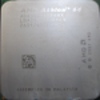
CPUs are the "brains of the computer system. This is where all of the information and instructions are gathered from, processed, and redistributed to the other components of the system. The following will be a description of a VERY RUDIMENTARY TEST to determine the viability of a CPU to function in a system. In actuality, there are a multitude of details and issues involved that would take far more space to cover and time to perform than is practical in these circumstances. This is a very basic overview of the essentials that are necessary to get through the process. For more information please consult other experienced volunteers, instructors, or research such sources as Wikipedia or forums on Google.
| STEPS
|
NOTES AND DETAILED INSTRUCTIONS
|
| Collect |
CPUs will accumulate in two areas:
- Advanced Testing Incoming Rack - there is a covered, foam lined bin on the rack labeled "Incoming CPUs".All CPUs extracted from systems by System Evaluation or other departments and CPUs that have come to the store as customer returns are supposed to be brought and deposited in this container. CPUs extracted in Advanced Testing during Motherboard triage should be deposited here as well.
- Receiving - there is a box on the top shelf of their rack, next to 'Unsorted Memory' labeled 'Processors'. In theory, all processors with pins are supposed to be brought immediately to us by Receiving, however, exceptions do occur. Other types of CPUs may gather there as well.
- At least once a day (preferably twice to three times) the contents of these collection points should be gathered and evaluated.
|
| Pre-test Evaluation and Storage |
CPUs will not be tested on a daily basis. Some socket types will accumulate more rapidly than others.
- Intel socket 775 processors will probably need to be tested every two to three weeks.
- AMD socket AM2 processors will probably need to be tested once a month.
- AMD socket AM2+ and AM3 processors are still extremely rare and can be tested whenever it is convenient (we currently do not have an AM3 test board).
Pending sufficient accumulation to warrant actual testing, the collected CPUs will be evaluated and stored as described below:
Evaluate the collected CPUs as follows:
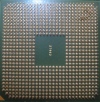
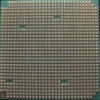
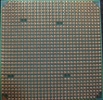
1. Socket Type
- Intel 775 - Retain in Pre-test Storage.
- AMD AM2/AM2+/AM3, Phenom - Retain in Pre-test Storage.
- Intel other than 775 (including 478) - Automatic Recycle.
- AMD other than AM2/AM2+/AM3 (e.g., 939, 754, socket 5, socket 6, etc.) - Automatic Recycle.
- Non-Intel or AMD (e.g., Cryix, VIA, etc.) - Automatic Recycle.
- Non-desktop system processors (e.g., laptops, servers [Intel Xeon, AMD 940, etc.], etc.) - Automatic Recycle.
- To differentiate among the AMD socket 754, 939, and AM2 see below:
 |
 |
 |
|
| Top of all 3 |
754 pins |
939 pins |
AM2 pins
|
2. Obvious Physical Damage
- Primarily this will be bent pins or pins broken off.
- This will only occur with PGA (Pin Grid Array) processors; socket 939s, AM2s, etc.
- This is not necessarily a sign to recycle the processor. Many can be rescued. A determination will be made at the actual time of testing - Retain in Pre-test Storage.
- If any pins are broken off - Automatic Recycle.
- This step of evaluation is primarily to determine whether there is an inordinate amount of damage occurring prior to their arrival in Advanced Testing so that the sources can be advised and corrective steps taken.
- Very rarely an LGA (Land Grid Array) processor (currently this applies only to Intel socket 775) may have a deep scratch across one or more of the gold contacts on the face. This is the equivalent of a broken pin on a PGA processor and cannot be repaired - Automatic Recycle.
- Very, very rarely ... there will be signs of scorching; indicating that a major thermal event has taken place sometime during the life of the processor. Again, this is not necessarily a sure indicator that the processor should be recycled unless the damage is obviously severe (melted metal, etc.). This is a judgment call that experience will teach - Retain in Pre-test Storage.
Put the sorted processors into Pre-test Storage or into the "Bad CPU" bin for recycling.
- Those processors going into Pre-test Storage are kept in basically the same place as the tested processors; on the shelf, in trays or other containers, in places designated by socket type.
|
| Sorting & Routing |
Sort and route the CPUs as follows:
1. Sort the CPUs by Model -.
- Sort first by processor type (e.g., P4, Pentium D, Athlon 64, Opteron, etc.).
- Sort next by model (e.g., Intel Core 2 Duo series have a 4 digit number, AM2 will have a long number that usually starts with ADxxxxxx)
- Make bundles of 5 proceesers by EXACT model.
- Sort by Intel or AMD on shelf.
|
| Preparation, Evaluation, & Testing |
When the is accumulation of untested processors in Pre-test Storage is sufficient to justify testing, bring the trays out of SDA for preparation, evaluation, and testing:
1. Prepare - Prepare the CPUs as follows:
- a. Place the Pre-test Storage tray on a work surface.
- b. Place a drop of solvent on the die (solid, metallic, upper surface) of each processor and smear until coated evenly.
- c. Leave for a minute or so to allow the solvent to work.
- d. Use a rag to clean thoroughly clean away all of the old thermal paste and other material from the die.
- e. Replace the processor in the tray and repeat until all of the processors have been cleaned.
2. Evaluate - Evaluate the prepared processors as follows:
- a. Processor type
- Intel socket 1156, 1155 and 1150 -
- i3, i5 and i7 - Retain for Testing.
- Core 2 Duo - Retain for Testing.
- Pentium Dual-Core - Retain for Testing.
- Pentium D - Retain for Testing.
- Pentium 4 - Automatic Recycle.
- Celeron and Celeron D - Automatic recycle.
- AMD sockets 939, & AM2/AM2+/AM3 -
- Athlon II - Retain for Testing
- Phenom - Retain for Testing.
- Athlon 64 X2 - Retain for Testing.
- Athlon 64 - Automatic Recycle.
- Opteron - Automatic Recycle.
- Sempron - Automatic Recycle.
- b. Pin Damage:
- There will be a great deal of subjective "judgment call" associated with this step. The actual process of repairing damage requires a great deal of skill, patience, and delicacy. This is one of those areas wherein you will need to learn by doing. Don't be afraid to take chances ... "if the patient dies, the patient dies". Ask instructors or experienced volunteers for help and advice. The tools you will need are in the box labeled "The Little Things That Count". Below are guidelines for deciding what to recycle and what may be worth attempting to save. Good Luck!
- AMD socket 939, & AM2/AM2+/AM3 -
- Many of these, particularly the Athlon 64X2s (which are dual core) can be very high end and therefore valuable. Also, the pins on these processors are somewhat coarser than those on the Intel socket 478s and so are a bit more sturdy and forgiving when it comes to manipulating them. Unless the damage is really severe; many bent pins, badly crimped pins, or broken pins, go ahead and give it a shot. Many a seemingly hopeless case has been brought back from the dead.
3. Test - Test the evaluated CPUs as follows:
- a. Set up the Test Station - A Motherboard test station works best
- The components for the station are stored in the bottom three drawers of the gray cabinet, next to the HD test racks, and consist of:
- A small, green, plastic box labeled "The Little Things That Count", containing:
- A power switch
- A tube of silicon based thermal paste
- Two small square foam pads
- A small, flat-head screwdriver (used for straightening pins)
- A pushpin (used for straightening pins)
- A plastic card (used for straightening pins)
- The motherboards for testing the CPUs labeled with the appropriate socket type.
- b. Unlatch or otherwise remove the Heat sink/fan assembly from the socket and apply a very small amount of thermal paste to the area that will cover the die on the processor. Smear the paste around to create a thin film. You will need to repeat this from time to time during the testing process.
- c. On the socket 775 board, it will be necessary to remove the Socket Protector.
- d. Select a processor from the Pre-test Storage tray and insert it into the socket.
- There will be various visual cues to enable proper alignment that are specific to each manufacturer and socket type.
-
- Intel socket 775s (a LGA socket) will have two notches on the processor platform that will align with two tabs on the socket frame.
- All of the AMDs (PGA sockets) will have small gold triangles on the processor platforms that will align with similar triangle markings on the socket frame.
- The AMDs are ZIF (Zero Insertion Force) sockets which means that it should take little or no pressure to get the processor to drop completely into place.
- If any resistance is encountered, a further inspection of the processor should be made to determine whether or not there are any bent pins. Correct as necessary (or possible).
- e. With your left hand, place the Heat sink/fan assembly onto the processor and align it so that it sits evenly. Apply gentle but firm pressure and maintain until the test is complete.
- f. With your right hand, turn on the power switch (make sure the power switch on the power supply is turned on as well).
- g. Observe the LCD monitor.
- If the small green LED stops blinking and remains steady, this is a good sign. The monitor should soon display a logo screen or a POST screen (if necessary take the necessary steps to get to the POST screen). These screens will vary from manufacturer to manufacturer. This is what you are looking for. This is the indication that the CPU is receiving, processing, and retransmitting data to and from the system. The CPU has passed.
- If the LED continues to blink, the LCD monitor remains blank, and it is difficult or impossible to shut off the system with the onboard power switch, the CPU has almost certainly failed. Be cautious, however, particularly at the beginning of a test run. If you are getting an unusual number of apparent failures (even in the middle of a test run):
-
- Check all of your connections, particularly the 'plus four' from the power supply, and the VGA cable.
- Check the RAM. Try a different stick of known good RAM.
- Retest a known good processor.
- Retest the suspect processor. If the result is still negative, you can have confidence in the result and the CPU has failed.
- Once you have established confidence in your results, you may proceed without repeating the above steps until another suspected anomaly occurs.
- h. When success or failure have been determined, turn off the power to the motherboard, either at the onboard switch or the power supply, and remove the CPU from the socket.
- i. If the test was successful, use a sharpie to write "Tested" on the top of the processor without covering any printed details. Then rebundle in stacks of 5 of the EXACT same model processors.
- j. If the test was a failure, place the CPU in the "Bad CPUs" bin for recycling.
- k. Repeat these steps until the test run is complete.
- l. Place bundled tested processors in storage.
- m. Dismantle the test station and return the components to the storage cabinet.
|
Notes:
Frequency, L2 Cache, and FSB are categories used to determine the capabilities of a processor.
- Frequency refers to the rate at which the CPU processes data e.g., 3.0 GHz. (Gigahertz).
- L2 Cache refers to the capacity of a designated portion of the CPU architecture to store short term instructions.
- FSB (Front Side Bus) refers to the rate at which the CPU transfers data between itself and the 'North bridge'.
- These terms are relevant here only for evaluation, labeling, sorting, and routing purposes. They each have very involved technical definitions and meanings that are far too involved to go into here. For more information, please ask and instructor, an experienced volunteer, or consult online sources such as Wikipedia.
- The specific information in these categories pertaining to an individual CPU can be obtained as follows:
- Intel socket 775s - The information is engraved on the die of the processor directly below the processor type. It will be listed in the form Frequency/L2 Cache/FSB.
- AMD socket 939s, AM2s, etc. - The information will be located in "The Book of CPUs", and found by referencing model number and part number. Ask an instructor or experienced volunteer to assist you.
to test a burner
- grab a drive
- jumper it so that the drive is a master
- plug the drive into the machine. Remember both the power and the ribbon cable.
- boot the computer (the computer will automatically login you into a GUI)
- Test the Drive With K3B.
- first simulate
- Second write some files to the disk, and make sure the program verifies
- Make a Sticker for the drive. the sticker should say its a "CD/RW or DVD/RW" its speed "**X" and "OK"
|
This page has been migrated to a document on Free Geek's Google Drive.
Information remaining behind may no longer be relevant.
MIGRATOR:
When you have tagged this page as migrated,
please add a link to the new document on Google Drive.
(Link to new page immediately below.)
|
Link
This document is written from the perspective of use in Hardware Testing, but the sections on Starting Disktest, During Testing, and Finishing a Batch should be relevant to use in other areas.
The technical details of the software used can be found on the Hard Drive Testing/Disktest page.
The process of hard drive testing incorporates verification of a drive's SMART status, verification of the drive's ability to write and read all available surface area of the drive, and repeated overwriting of any previous data on the drive to ensure donors' data security.
The actual work to be done on hard drive testing ideally needs to happen only twice a day; once for a batch of smaller drives (≤100GB) in the morning and once for a batch of larger drives (>100GB) to run through the afternoon and overnight if necessary.
Important note on Solid State Drives (SSD): The testing methodology we employ is intended for magnetic disc media and use on SSDs may not completely remove user data and/or may shorten the useful life of the device. As the number of donated SSDs is beginning to increase we are currently developing an approach for testing and wiping these devices properly; currently any SSDs received are to be securely stored and should NOT be reused until we can verify secure data destruction.
Setting Up
If there are finished hard drives already on the racks then proceed to Finishing a Batch.
- The drives in the box should be fairly well organized by size and interface. If this is the first batch of the day you'll want to grab smaller drives. If it's the second batch you can go for the larger ones. Load up the tray with an equal number of IDE- and SATA-connected hard drives. Don't forget about the 2.5" (laptop-sized) drives on the smaller top shelf! If they are present and you have the time you should grab a few SCSI drives as well. Be sure to lock up the big brown box again when you're done.
- Take the tray of drives over to one of the wiping racks and start connecting them to the boards. Most boards have 4 connections with various mixtures of IDE and SATA cables.
- Try to keep all the drives connected to a single board around the same size so we don't have 3 smaller drives finished and waiting around sucking electricity while the 1 larger drive is still finishing.
- Look the drives over for identifying information while you're connecting them; be sure you can clearly identify the model and serial number of the drive. You may need this information for sorting the failed drives from the passed drives later on. If you can't find the serial number on a drive then make sure you're attaching it to a board with other drives you can positively identify so you can use process of elimination when identifying the finished drives.
- Check the jumpers on IDE drives and make sure they're set to Master. For most drives this is set by a single jumper positioned vertically between the two pins closest to the IDE pins; check the labels on the drives as they will generally indicate if they require a different arrangement (or default to Master with no jumpers at all).
- SCSI drives can be tested in the bays attached to board 8 on wiper 0 and 2.
- As soon as you've connected all the drives to a single board, turn it on. You can move on to hooking up another board while the first one boots up and does the initial check of the drives.
- Once a board has finished booting and Disktest has started (you will see a list of the detected hard drives and a prompt asking about drive details) proceed to Starting Disktest.
Starting Disktest
Disktest is our nifty little in-house hard drive testing and wiping program.
When Disktest first starts you will be presented with a list of drives that should look something like this:
PASSED sda: -?-  IDE 80.0GB <<Seagate SD380830A (5GQ1DB70)>>
FAILED sdb: 2.5" IDE 80.0GB <<Samsung SV400AH (173G27Q37282S)>>
PASSED sdc: -?-  SATA 80.0GB <<Seagate SD380830A (5GQ1HG92)>>
PASSED sdd: 3.5" SATA 80.0GB <<Western Digital WD800JBB (WMAMF92810)>>
The information on these lines indicates the following:
- PASSED/FAILED: The SMART status of the drive after the initial test.
- sda/sdb/sdc/sdd: The identifier the system has assigned to the drive.
- -?-/2.5"/3.5": The form factor of the hard drive.
- IDE/SATA: The drive's connection type.
- 80.0GB: The capacity of the attached drive.
- << ... >> : The drive manufacturer, model number, and the device serial number in parenthesis.
Form Factor Logging
If any of the detected drives have an unknown form factor (indicated with -?-) you will receive the following prompt:
Correcting drive details:
        1: Correct Serial Numbers
        2: Correct Form Factors
        3: Finished Making Corrections
What would you like to do?:
Select option 2 and use the following menus to specify the correct form factor for the attached drives. Laptop-sized drives are 2.5", desktop-sized drives are 3.5", and anything else can be recorded as Other. While making changes to form factors be sure to also check that serial numbers are accurate and correct them as necessary; these are required for proper tracking of secure data destruction batches.
Note on form factor logging: Hard drives have no way of reporting their form factor, so we are using a system that looks up the form factor associated with the last-tested hard drive of the same model. If you misidentify a drive's form factor it will be misidentified for all subsequently tested drives with the same model number until it is corrected for future devices.
Verifying Drive Details
If you did not need to specify any form factors then the first prompt you will receive is:
Are the hard drive serial numbers and form factors displayed correctly above? [yes]:
If any corrections are necessary then an answer of 'no' will take you to the same data correction submenus you would have been presented with for Form Factor Logging above.
Once all drive details have been confirmed the next prompt will be:
Begin testing the listed drives? [yes]:
Before starting the test, go through the following checks:
- Are any drives marked as FAILED? If so you will want to abort the test and power off the board then replace the failed drive(s) and start the board again.
- Are all the attached drives on the list? Double check that the power and IDE/SATA cables are firmly connected and try to determine if the disc is actually spinning. If any connections were loose you will need to abort the test and restart the board to redetect the devices. If the connections seem solid and the disc is spinning you may need to try the drive on another board or with another combination of drives; incompatibilities happen.
- Are the drives indicating the capacity they're labeled with? Some variation is normal; a drive labeled 80GB reporting as 83.0GB is common, a drive labeled 200GB indicating 3.4MB is a fail.
- Is the manufacturer and model information accurate? Drives from some manufacturers will report some information as "Unknown" and this is fine, but a string of total gibberish is a good indicator of failure.
- Are the listed form factors and serial numbers correct? At this point there is no further option to make corrections without aborting entirely and starting over, but you should do so if necessary.
If you notice any of the above problems then answer 'no' at the prompt. The test will be aborted and you will be given a final status screen that will indicate the drives did not complete testing or were recorded as failed due to a SMART failure.
If it looks like everything is in order then just strike Enter to give a positive response and the test will begin!
During Testing
While disktest is running it will output status updates on the drives every few seconds.
sda: 3.5" IDE 80.0GB <<Seagate SD380830A (5GQ1DB70)>>: 13% of wipe complete - 2:58:02
sdb: 2.5" IDE 80.0GB <<Samsung SV400AH (173G27Q37282S)>>: 80% of badblocks read (part 1) complete - 2:58:02
sdc: 3.5" SATA 80.0GB <<Seagate SD380830A (5GQ1HG92)>>: all tests passed:
---
-smart test passed
-initiating smart self-test
-badblocks test started
-100% of badblocks read (part two) complete
-smart test passed
-disk wipe started
-100% of wipe complete
-disk wipe finished
-smart test passed
-2:08:32
sdd: 3.5" SATA 80.0GB <<Western Digital WD800JBB (WMAMF92810)>> 22% of badblocks write (part 2) complete - 2:58:02
Any variation on the outputs above is normal. Drive sdc in the example above has successfully finished testing and wiping and is giving it's final status summary. If you notice drives' progress percentages or running time failing to advance this may indicate the system has frozen and needs to be restarted. If you suspect a freeze then make a note of which board it is and what the percentages/times indicated are; check it again in 10 minutes and abort testing if there has been no progress.
The video output from the board will automatically switch off after a while; if you do not see any output from a running board you can press any key to "wake" the display. However, avoid the Enter key as this may accidentally power down a finished test before you can view the results.
Testing can be aborted at any time using the keyboard command Ctrl-C. A final status screen will be presented and any drives that have already finished testing will be indicated as such and can be considered passed.
Finishing a Batch
Once disktest has finished you will be presented with a results screen like this:
sda: 3.5" IDE 80.0GB <<Seagate SD380830A (5GQ1DB70)>>
sda passed! Label and store it.
sdb: 2.5" IDE 80.0GB <<Samsung SV400AH (173G27Q37282S)>>
sdb failed! Recycle it!
sdc: 3.5" SATA 80.0GB <<Seagate SD380830A (5GQ1HG92)>>
sdc passed! Label and store it.
sdd: 3.5" SATA 80.0GB <<Western Digital WD800JBB (WMAMF92810)>>
sdd passed! Label and store it.
Hit enter to shut down.
- Fill out a hard drive label (Avery 5167) for each hard drive that has passed, then physically identify the passed drives.
- Attach the labels to the passed drives. You can either do this while they are still on the rack, or press enter to power down the board and disconnect the drives before labeling them.
- Be certain you have positively identified all drives before powering down the system as there is no easy way to recall these results once the board is off.
- Do not place labels over model numbers, serial numbers, or other identifying information that may be necessary for future tests.
- Place the passed and labeled drives in the green tray to await Hard Drive storage in build room. 80GB-160GB stored in labled crates, 200GB & larger get locked in box 107 in build room.
- Destroy failed drives promptly.
- Start a new batch!
Related Tasks
Destroying Failed Hard Drives
- 3.5" drives (desktop sized) should be destroyed in the Wheel of Death (hand-cranked drill). Position the drive so that the drill will penetrate the magnetic platters; avoid drilling straight through the spindle as this damages the drive enclosure more than the data-bearing platters and makes them difficult to disassemble in recycling.
- 2.5" drives (laptop sized) can be placed on the floor and struck (not too hard!) with a hammer so that the enclosure is bent in and crushing the platters.
Sorting Incoming Hard Drives
Incoming hard drives will be removed from systems in the SDA by SDA staff only; hard drives will be sorted by size & capacity until wiped; Currently they are grouped by size (≤100GB, >100GB to <300GB, >300GB/all SCSI) and interface (IDE/SATA).
Storing Passed Hard Drives
- Passed 3.5" (desktop) drives should be stored in the build room. There are crates in the build room labled with the capacity and either SATA, or IDE. There are also special purpose bins for size/interface combinations needed for special systems and projects.
- Passed 2.5" (laptop) drives are stored in the laptop area; the bins are organized by size and interface.
Future: Certificate of Destruction Tracking
Work In Progress Notes
- When we get a box of drives which we will need to generate a report or certificate for, all of the serial numbers will be added to a new "disktest batch" in the database.
- If the donor requires us to track removing them from systems, the optional system serial numbers need to be entered too.
- The "disktest batch" report will then collect information as matching drives are tested until it has a "PASSED" or "destroyed" status for all drives, which will allow the report to be finalized.
- While testing on machines designated for testing "certificate of destruction" drives, undetected or incorrect hard drive serial numbers will need to be entered twice to confirm they are correct. The tester should check they are reported correctly when asked "Are the hard drive serial numbers displayed correctly above?".
- If a drive is not detected in disktest, it can just be marked destroyed.
- Drives that complete testing without a "PASSED" status (FAIL, STOPPED, ABORTED, etc) will need to be marked as "destroyed" in the "disktest batch" record to confirm physical destruction before they can be considered resolved.
- Note: They should be marked as they're being destroyed, or a printed version of the list should be used to track as this happens.
- After all hard drives have either "PASSED" or been marked as "destroyed", the report can be marked as finalized and used.
|
This page has been migrated to a document on Free Geek's Google Drive.
Information remaining behind may no longer be relevant.
MIGRATOR:
When you have tagged this page as migrated,
please add a link to the new document on Google Drive.
(Link to new page immediately below.)
|
New Page
| STEPS
|
NOTES AND DETAILED INSTRUCTIONS
|
| Determine what kind of Network Device it is |
- There are several kinds of network devices.
- Hubs
- A hub is a device that provides multiple ethernet ports for plugging in multiple wired devices into a network. From a technical standpoint, hubs are fairly simple: they take information that is received over one port and sends it back out over all the other ports. In order to work properly, a hub typically requires the existence of a device that manages and directs traffic somewhere on the network it is plugged into in order to work properly.
- Switches
- A switch is essentially a hub that can better handle more information passing through it. Like a hub, a switch needs a device that manages traffic on a network in order to work properly.
- Routers
- A router is a small computer, typically with a built-in network switch, that manages and directs traffic. A router can assign IP addresses to computers, pass their requests for information from computers to a gateway, and redirect incoming information from a gateway to a specific computer. A router itself is typically the central component of a home network.
- Gateways
- A gateway is a device that allows you to connect networking devices to the Internet. Gateways typically only allow one connection for a network device, but newer ones have built-in routers and switches. Some may also create wireless networks. A cable or DSL Modem is a type of gateway.
|
| Determine if the Thrift Store wants it |
- Check the Whiteboard.
- In an open Firefox browser, click where the toolbar says "Whiteboard." You can also find it here: Whiteboard. This will tell you what the store does and does not want on that day. Recycle anything that they do not want.
- Things we don't test
- Recycle anything not needed by the store, and any of the above items which we do not test.
|
| Pair the Network Device with Power Supply |
Somewhere on the device it should give the required voltage and amperage. Once you find a matching power supply that fits, plug in the power supply and place both the device and power supply into the blue bin for network devices to be tested.
|
| Check for Damage |
If it's missing parts or visibly broken, recycle it. If there's dirt or grime wipe it down with a rag and some cleaning solution.
|
| Check for Power On |
Grab a networking device and its attached power supply from the blue tub. Plug the device into a power source.
- If there are power lights, make sure they come on.
- If there is a reset button, press it for ~30 seconds to restore default settings.
|
| Test Networking |
- Connect the blue Ethernet cable attached to the computer to one port and the gray Ethernet cable labeled Das Unternet (yellow tag) into another port on the switch.
- Open FireFox and click the Drydock icon on the far left of the bookmarks bar at the top. If the connection is good, you will see a page that says It Works! You might need to disable wireless connect for the test to work(Uncheck Enable Wireless).
- Test the remaining ports the same way. Make sure to do this systematically so you know all ports have been tested at the end.
- If the one or two highest-numbered Ethernet ports don't work, they're most likely designed to be used to connect to another device in the network.
- If it is a wireless router
|
| Final Preparation |
- Affix a "Tested By" sticker with your initials on the device.
- Place in the "Store" box.
- If it is the last device you're testing for the day, please clean up the testing station, putting away tools, cables and everything else.
|
|


