Difference between revisions of "Keyboard Testing"
Jump to navigation
Jump to search
| Line 103: | Line 103: | ||
[[Image:PS2.png|left||thumb|375px|This is a PS2 keyboard connector.]] [[Image:USB.png|right||thumb|375px|This is a USB keyboard connector.]] | [[Image:PS2.png|left||thumb|375px|This is a PS2 keyboard connector.]] [[Image:USB.png|right||thumb|375px|This is a USB keyboard connector.]] | ||
| − | \n \n \n \n \n | + | \n |
| + | \n | ||
| + | \n | ||
| + | \n | ||
| + | \n | ||
==Mac Keyboards== | ==Mac Keyboards== | ||
Revision as of 14:53, 5 June 2010
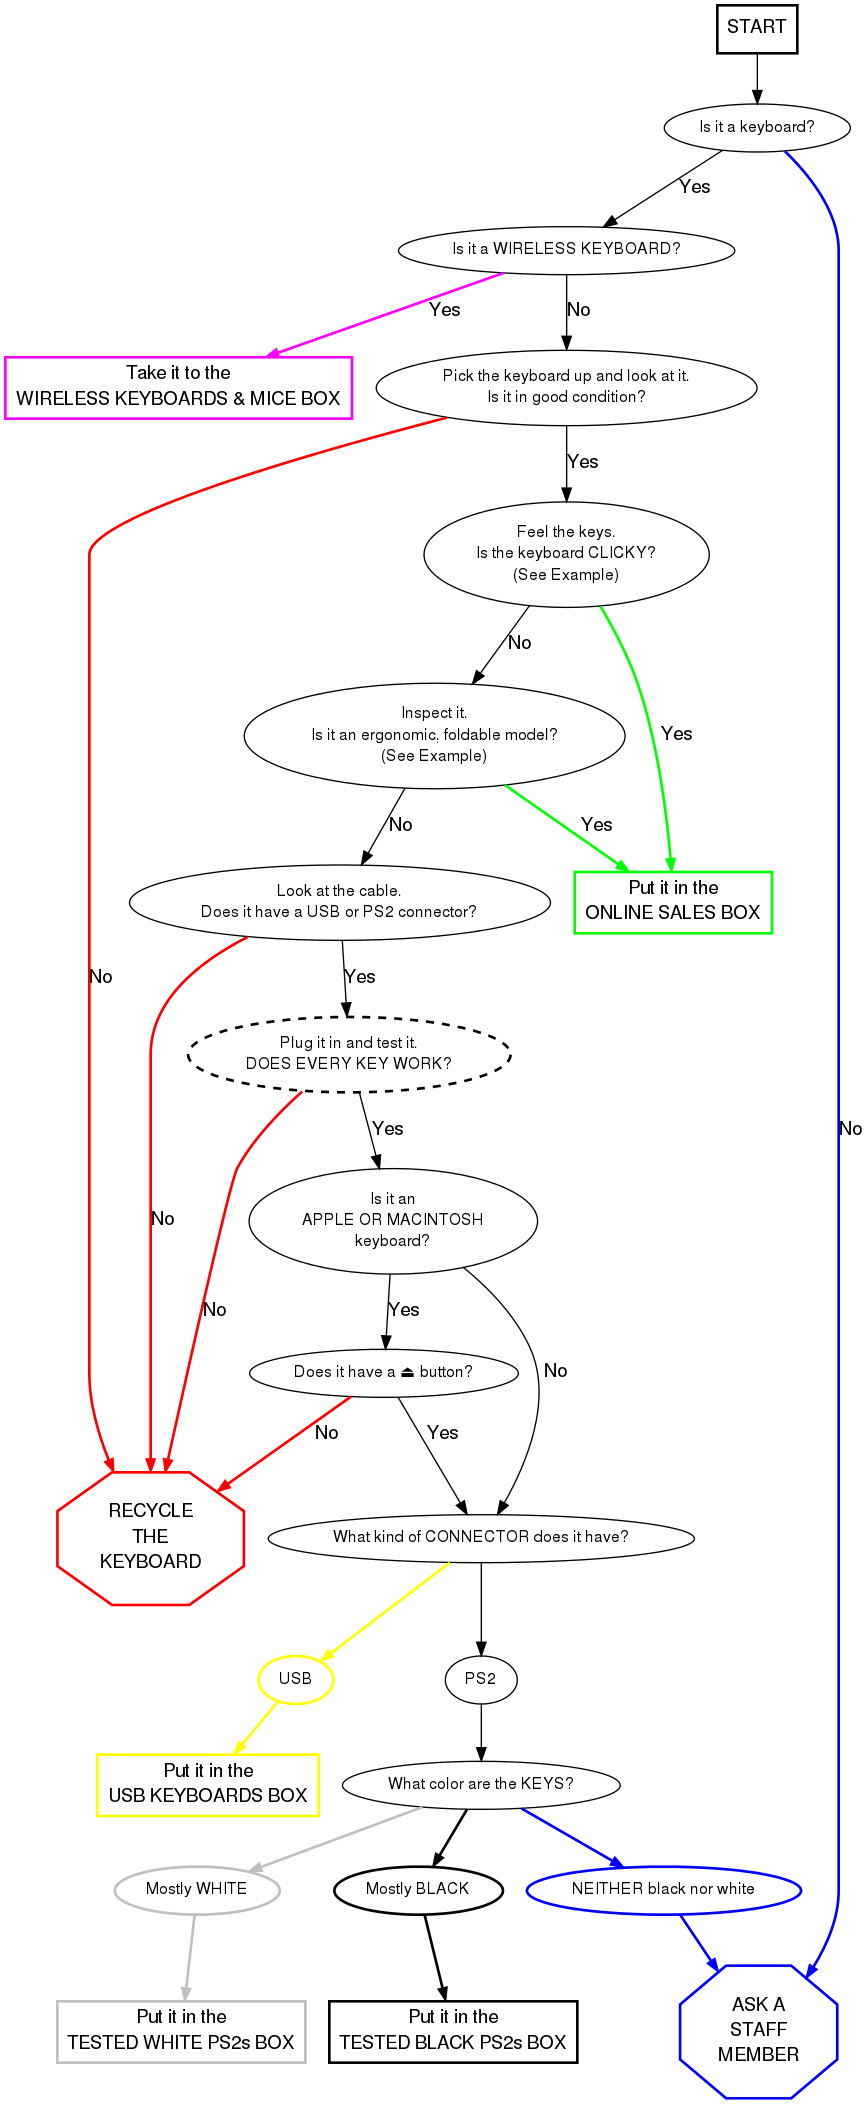
Testing Keyboards
Keyboards are tested for functionality. The good ones are then distributed throughout the facility.
The bad ones are recycled.


\n \n \n \n \n
Mac Keyboards
The ⏏ (Eject) button for all Macintosh or Apple keyboards is located on the upper right-hand corner of the keyboard, as shown below.


Older Mac keyboards do not have this button; an example USB keyboard is shown here:

Testing Instructions
- Turn the computer on.
- Connect the keyboard to the system using the extender on the right, or the USB port in front.
- To test a Macintosh or Apple keyboard, select the "Apple Layout".
- To test standard keyboards, select the standard "104-key Layout".
- Select CONTINUE.
- Go through and test every key.
- You will see on the screen what looks like a keyboard. Press a key on your keyboard.
- If the corresponding key on the screen turns black, it works.
- If the key does nothing, it does not work.
- If any keys do not work, RECYCLE the keyboard.
- When you have determined that a keyboard does not work, cut off the cord.
- Put the cord in the metal shopping cart in the main receiving room.
- Put keyboards in the shopping cart closest to you.
- When a cart gets full, notify a staff member.
- When you have finished testing a keyboard, hit "Reset" to reset the image in the program.
- Place working keyboards in the appropriate boxes.
- When a box gets full, ask a staff member where it goes.
- Plug in a new keyboard and start all over!