Build Instructor Database Guide
|
This page has been migrated to a document on Free Geek's Google Drive. Information remaining behind may no longer be relevant. MIGRATOR: When you have tagged this page as migrated, (Link to new page immediately below.) |
This guide is intended to serve as a reference for Build Instructors in how to use the Free Geek Database (FGDB). From the database, Build Instructors can sign off on QCs and Assemblies, give credit for Rejects and Projects, look at a Builder's Status Sheet, and see the Volunteer Schedule.
In order to log into to the database, you have to be physically connected to our LAN. In this case, Build Instructors can use either the Research Stations in the Buildroom, or any system on the workbench that is connected to the network.
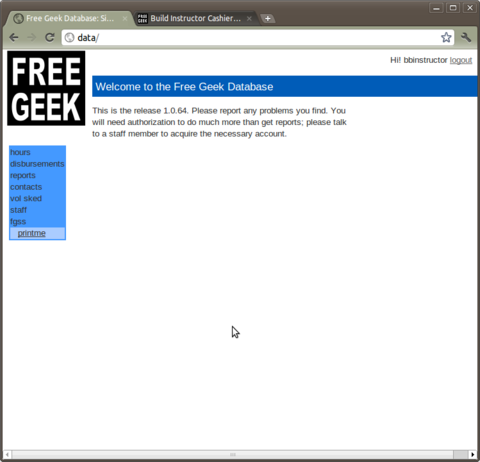
Once you're connected, you need only open a web browser and enter data into the address bar. You'll come to a screen where you can enter your FGDB login name and password (If you can't remember your login credentials, or you're not sure you ever received one, talk to the nearest staff person).
Signing off on Printme
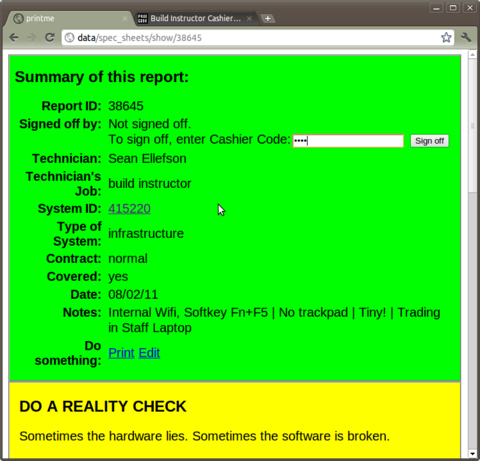
To sign off on a Printme, all you need to do is enter your Build Instructor code in the field at the top of the Printme page, as shown here:
As we begin transitioning into only using the FGDB, it's important that you always sign off in this way. Builder's credits towards a Take-Home box won't be applied until their Builds and QCs have been signed off. If you mistakenly sign off on something and need to remove your sign off, all you have to do is enter your Build Instructor code again to remove it.
Giving Credit for Projects & Rejects
In order to give credit for something other than a successful Assembly or QC, you need to go to the System Specs page, located under fgss >> printme:
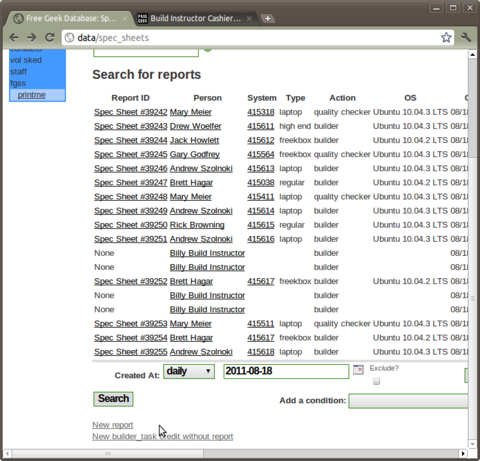
If you scroll to the bottom of the screen, you'll see two links on the bottom left corner: New report & New builder_task credit without report. Click on New builder_task credit without report:
On the New builder_task page, you can select what kind of credit the Builder will receive (either a Build or QC, for our purposes). Enter their volunteer number, and a note describing what the credit is for (e.g., 3+ Laptop QCs, Reject, etc). Then click Create:
You'll then be taken to a page where you can sign off on their credit. Please note that this credit won't be put towrads a Builder's Take-Home until it's been signed off by a Build Instructor! Remember to sign off! Once you've signed off, you can safely navigate away from the page.
Looking up a Builder Status Sheet
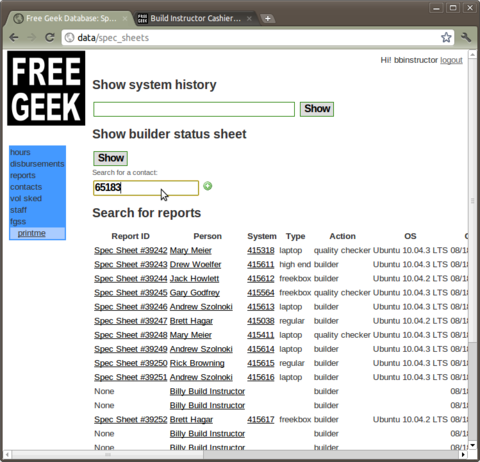
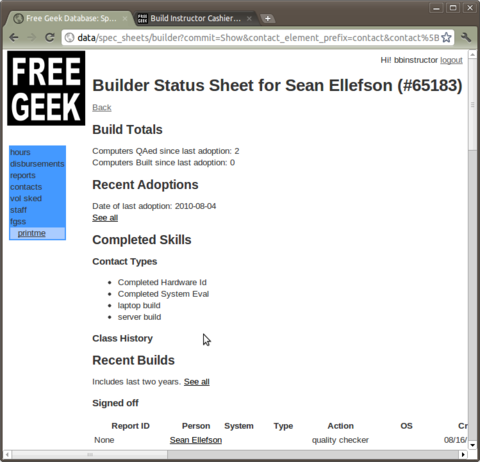
In order to look up a Builder's Status Sheet, log into the FGDB and go to fgss >> printme. This is the Free Geek System Specs page, where you can see all of the reports run for that day, look up a system's history, and look up a Builder's Status Sheet. Under Show builder status sheet, enter the Builder's volunteer number and click Show:
From the Builder's Status Sheet, you can see how many systems they've Built and QCed since their last disbursement, completed skills (e.g., Hardware ID, System Eval, etc), and a list of machines they've recently put together. Try looking up some of your favorite Free Geekers, and awe at the number of machines they've kept out of landfills!
Finding your Build Instructor Code
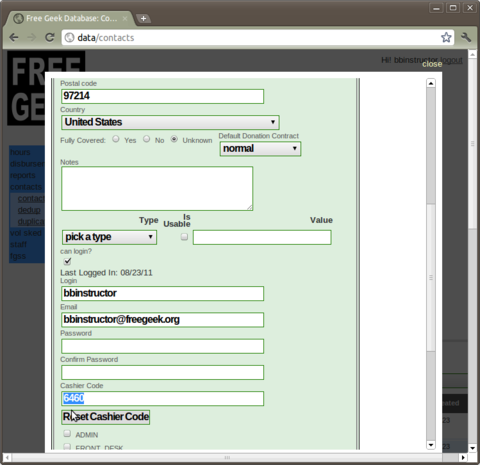
If you forget your Build Instructor Code, or you want to reset it, log into the FGDB and navigate to contacts >> contacts. Enter your volunteer number, and press tab. A light blue box with your name and some information will come up, and at the bottom left is a small icon of a piece of paper and a pencil. Click it!
This will open a window where you can edit and update your contact information. If you scroll to the bottom of that window, there will be a field that says Cashier Code. This is your Build Instructor Code! If you want or need to reset for any reason, click the Reset Cashier Code button just below it. Be sure to scroll all the way to the bottom and click save in order to affect the change.

