Online Sales
Jump to navigation
Jump to search
Presently under massive contruction
Creating an eBay listing
- 0. Research your item to see if it is worth selling
- If the shipping cost of an item is more than the final price of an item, it is probably not worth selling on eBay due to the time it takes to properly package items of that size (a 20-lb package in a 20" cube would cost $60 or so to ship via USPS Priority Mail).
- 1. Take pictures of the item with the Online Sales digital camera
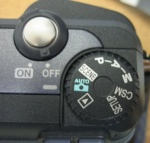
- There are two modes you will be using when operating the camera: View mode and Picture mode
- Document/photograph any irregularities the item has (writing, dents, etc).
- Don't be afraid to take too many pictures. You can always sort and pick out the best ones later.
- 2. Plug USB cable into camera, and turn it on in View mode.
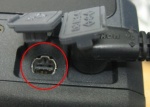
- The camera's USB port is located on its side.
- Ubuntu's Import Photos prompt should pop up on the screen as soon as you turn the camera on in View mode.
- Select the pictures you want to import (you can select more than one picture by holding the Ctrl key and clicking on additional pictures), and hit the Import button.
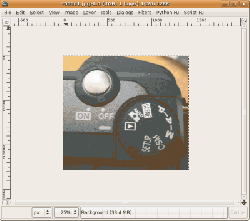
- 3. Open the imported images in GIMP
- You can either launch GIMP from the Applications menu, or you can right-click on an image in the file browser and select Open With "GIMP Image Editor".
- 4. Edit images with GIMP
- Select the Rectangular Selection tool, which is located in the upper left corner of the GIMP's main window.
- Crop out any excess background by selecting the area of the image you'd like to keep using the Rectangular Selection tool, right-clicking, and selecting Image -> Crop Image from the right-click menu.
- To resize images, right-click on the image and select Image -> Scale Image from the right-click menu. Once the Scale Image window appears, change the number in the Width field to a maximum width of 600 pixels (make sure the chain icon connecting the Width and Height fields is present, as this makes the scaling of the image proportional).
- To save your edited image, go to GIMP's main window, select File -> Save As from the menu bar, and give your picture a unique name. Make sure to note where you save the image.
- 5. Upload edited images to web server using gFTP (or your preferred SFTP client)
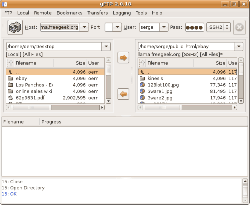
- In order to put images online so they're accessible to the world, we need to use an FTP client that can use SSH2 to transfer them to Free Geek's web server. This is what your typical GUI-based FTP client looks like:
- Use the standard online sales account when uploading images (ask the Online Sales Coordinator for this info).
- Make sure the server is set to llama.freegeek.org, port is set to 22, and mode is SSH2.
- Navigate to the proper directory on the server ( public_html/ebay in the online sales account's home directory), and upload the images.
- Note the names of the images you uploaded, as you'll be needing them to edit th4e eBay template.
- 6. Edit the eBay template using Bluefish (or your preferred HTML editor)
- Once your images are online, you can edit the standard eBay template to include them after writing up a short description for your item. The only parts of the eBay template you should worry about are between the parts that are labeled for editing.
- Fill in the description area with a brief statement about the item up for auction, including any issues it may have.
- Insert the images you uploaded to the server using <img src="http://">, as shown in the template.
- Save your edited template under a different filename.
- 7. Submit your listing to the Online Sales Coordinator for proofreading
Packing items for shipping
More to come later.


